Author Topic: Mini Bike  (Read 6326 times)

0 Members and 1 Guest are viewing this topic.

Dennis

  • Club Member
  • *****
  • Posts: 1726
    • View Profile
Mini Bike
« on: November 06, 2015, 10:13:25 AM »
Can't have winter without a winter project to document and share blow by blows with my brethren.

When I was a kid, my parents were against all gas powered toys.  I watched with envy other kids who had go-carts and mini-bikes.  Back then (late 60's and 70s) the small industrial engine mini-bikes were the coolest things a kid could have.  45 years later and I want to recapture my deprived childhood.  I want to build a mini-bike.

I want to do a fat tired version along these lines:


This is a kit offered by Big Dog out of California.  I have been in touch with them about the rear wheel hub, sprocket and brake.  They custom make the hub depending on how far out from centre you need the flange to mount the sprocket/brake disc.  Mine's 5.5 inches with the big fat 22" x 11" x 8" wheels and balloon tires I bought already.


There is a front end from an old Honda ATC in the bush at my father-in-laws.  Its one of the early rigid type.  It has a front brake and axle which may be salvageable.  Despite the mini bikes of old having no front brakes, I think I'd like one if I can do it easy enough.

Kim at KK Motors has the best prices on torque converters (Chinese copy of Comet).  I'd like to use a Briggs & Stratton engine, but Princess has the Powerfist 205cc (7 hp) on sale for $139. 

Peace & Grease, Dennis

Dennis

  • Club Member
  • *****
  • Posts: 1726
    • View Profile
Re: Mini Bike
« Reply #1 on: March 07, 2016, 09:02:02 PM »
Got some work done this weekend.   Jeff made the wheel hubs.  I had bought some online, and when they arrived I decided they were junk so I had Jeff fabricate new ones to my specifications.  Much better.


Mock up just to get an idea of proportions.


With frame building, jigs are everything.


The front wheel will be a lot further forward than this photo.


Peace & Grease, Dennis
« Last Edit: March 08, 2016, 09:23:14 AM by Dennis »

Dennis

  • Club Member
  • *****
  • Posts: 1726
    • View Profile
Re: Mini Bike
« Reply #2 on: March 15, 2016, 09:21:58 AM »
Fork parts are all cut and fitted.  This was a lot of work.  The dog leg tubes I did a couple months ago with my tubing bender.  They took some tweaking with a torch to get the tops parallel with the bottoms.  The front axel mounts are hydraulic cylinder tangs from Princess Auto.   Jeff machined them down so they would fit in the tubes.  There are nylon/plastic bushings in the neck tube; Jeff made those also.


Peace & Grease, Dennis

Dennis

  • Club Member
  • *****
  • Posts: 1726
    • View Profile
Re: Mini Bike
« Reply #3 on: March 18, 2016, 09:26:59 AM »
I welded up the forks last night.  I am pretty happy with my welding. 

I made this jig for cutting off the tops of the tubes.  The holes were just big enough to go around the welds, and the plate is 3/16".  I used the band saw first followed by a belt sander for a flat, consistent cut.


I was planning on making my own handle bars.  I bought a 7/8" die set for my tubing bender.  However, these ape hangers are almost exactly right. 


Peace & Grease, Dennis
« Last Edit: May 18, 2016, 01:25:18 AM by Dennis »

Dennis

  • Club Member
  • *****
  • Posts: 1726
    • View Profile
Re: Mini Bike
« Reply #4 on: March 20, 2016, 07:43:01 PM »
Bought some rod, some crown nuts and a die and set to work making my own axles.


With axles come wheels.


Mock up.  Just trying to get an idea, and make sure all my previous measurements were right.  So far, so good.


The engine mounts are between tack welding and finish welding.  They're enough that I could fire it up without worrying that every thing would move or break, but definitely not finished.  It took lots of tweaking to get the chain running smooth.


The brake mount has not been welded, but is ready to go. 


Peace & Grease, Dennis
« Last Edit: April 01, 2016, 10:24:23 AM by Dennis »

Sr.X

  • Forum Member
  • *
  • Posts: 246
    • View Profile
Re: Mini Bike
« Reply #5 on: March 20, 2016, 08:22:08 PM »
Looking good Dennis, you will have fun with this bike. As much in the building as in the riding. I'm going with Hondas technology and picking up my daughters old mini bike on Wednesday to refurbish it in case I get grand children. Someone needs to ensure that they can terrorize the neighbourhood when and if my daughter has kids. She has the main ingredient "husband " and is buying a place with lots of room to ride. I plan on having one of my bikes there so I have something to ride when I visit, someone has to teach children how to get away with riding where mom and dad don't approve.

fast1

  • Guest
Re: Mini Bike
« Reply #6 on: March 21, 2016, 09:59:31 PM »
  Love your build threads--lots of detailed pictures and good descriptions, almost like being there. You are truly becoming a master fabricator and probably the only one that moonlights as a lawyer! CHEERS.

Dennis

  • Club Member
  • *****
  • Posts: 1726
    • View Profile
Re: Mini Bike
« Reply #7 on: March 28, 2016, 11:34:40 AM »
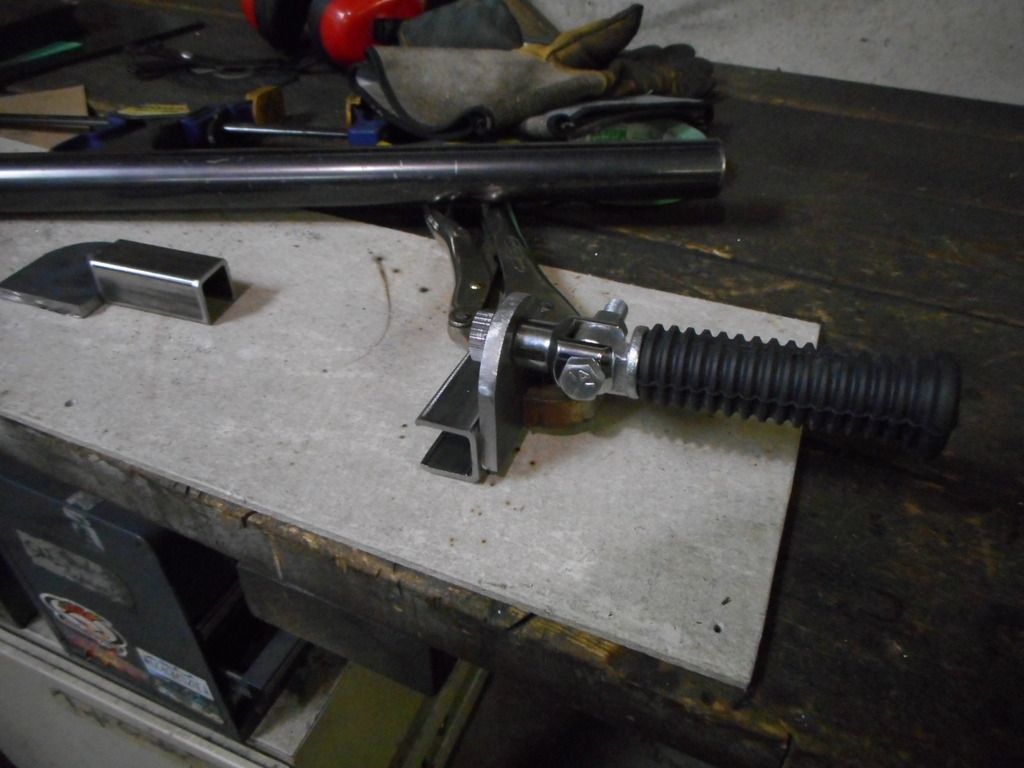
I had to make the brake lever off-set.  Making the lever was easy enough.


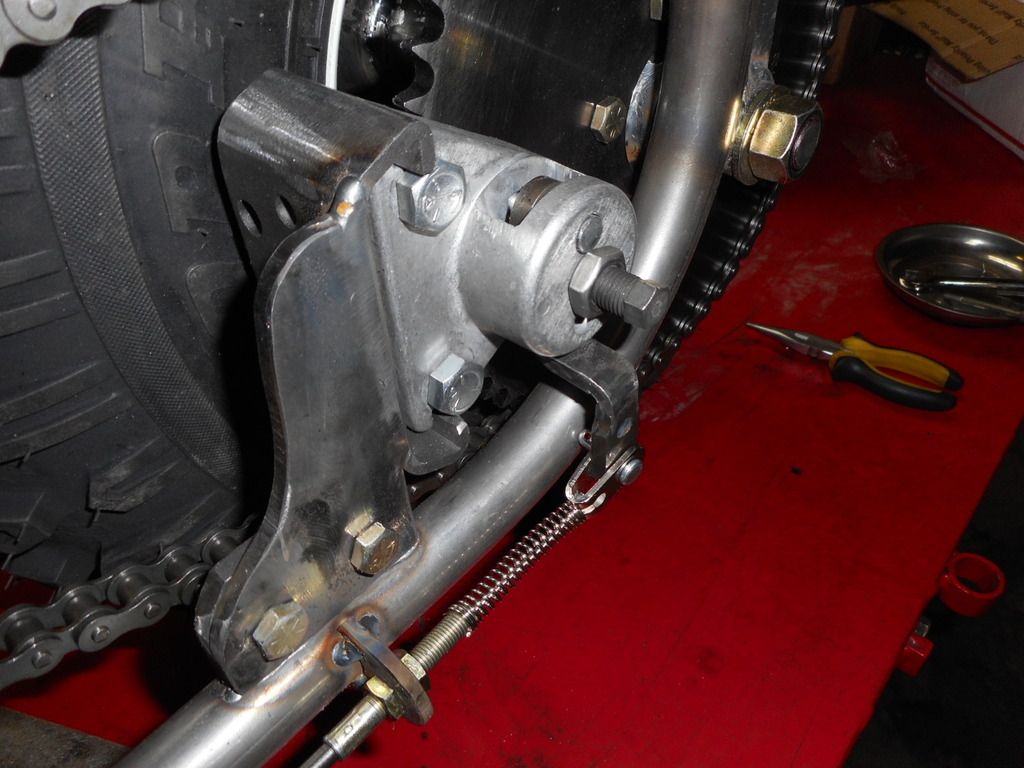
However, once the lever was off-set, it twists when its pulled.  The lever is designed to be pulled in a straight line, so the pin through the lever is really sloppy.  I'm going to have make a better fit so that the lever twists less when pulled.  The brake works really well and the "twisting" applies pressure just fine, but its sloppy.


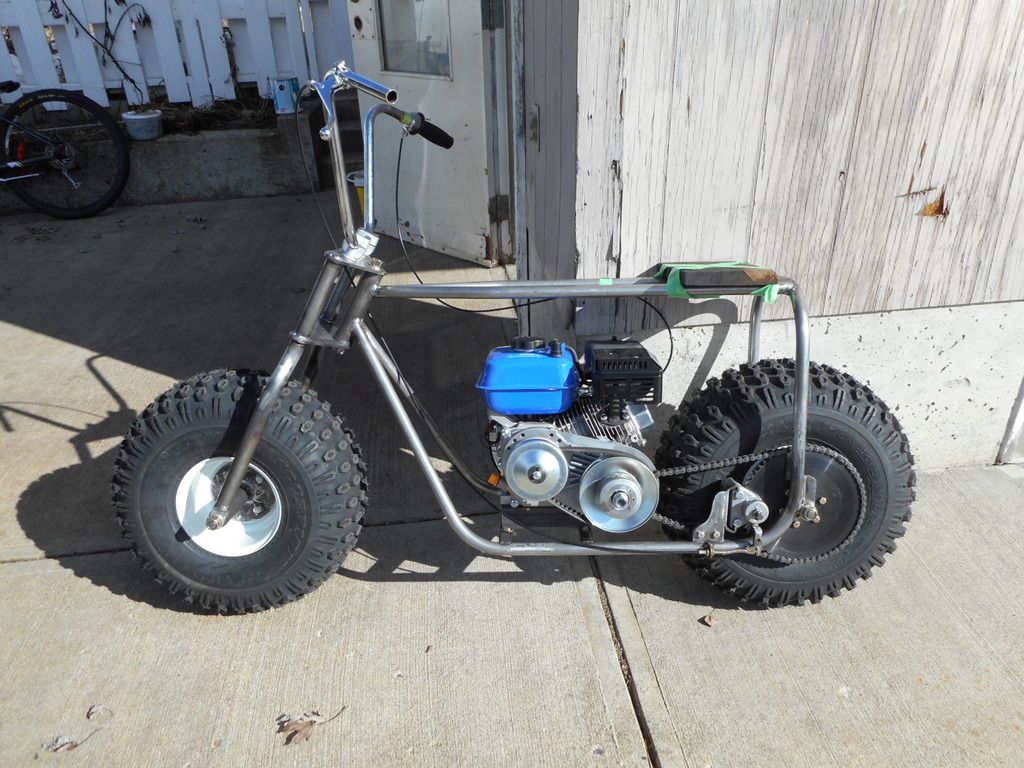
First spin.  Fun.  I taped on the board after riding it with my ass on the tubes.  No foot pegs yet so all of my weight was on my ass.


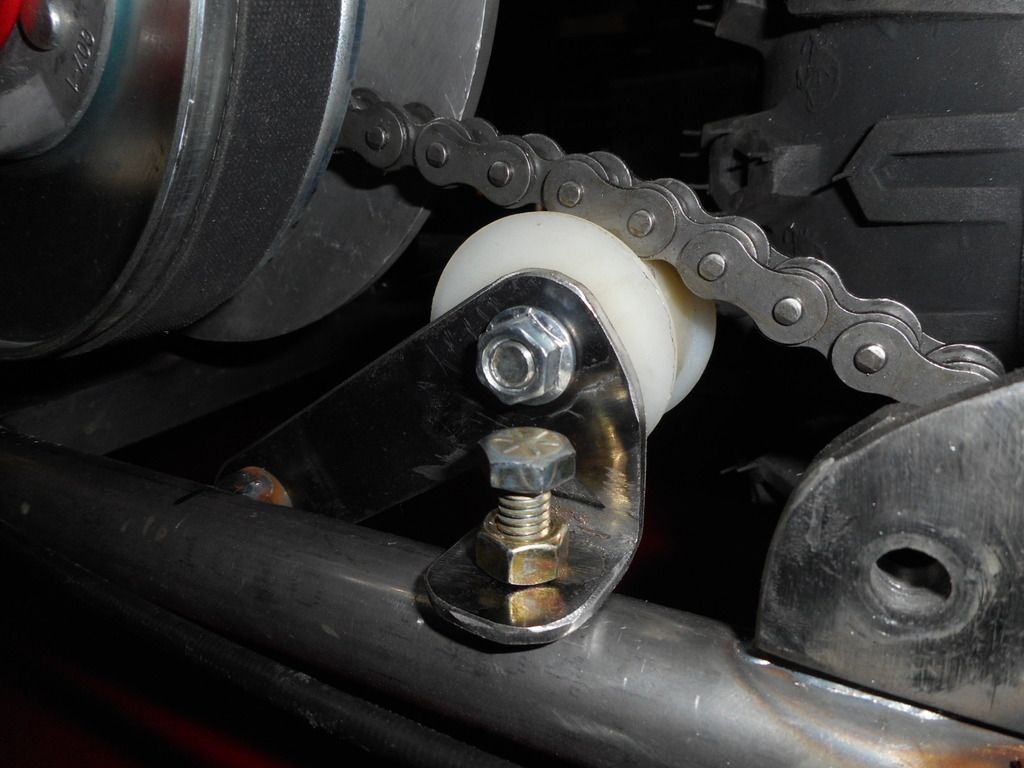
The fancy spring loaded idler I bought, ended up being pared down to just the roller.  This works perfect.


I had a set of Harley peg mounts kicking around.  I picked up a set of "take-offs" passenger pegs from the Harley shop for $10 a piece.  I have not welded these on yet because of the tight space under the engine.  I'll weld them on when the engine comes out.


The fenders are a real issue.  After much humming and hawing, I decided that a widened version of a Princess Auto trailer fender would work fine.  Bought two, split off centre and re-welded.  So far so good...


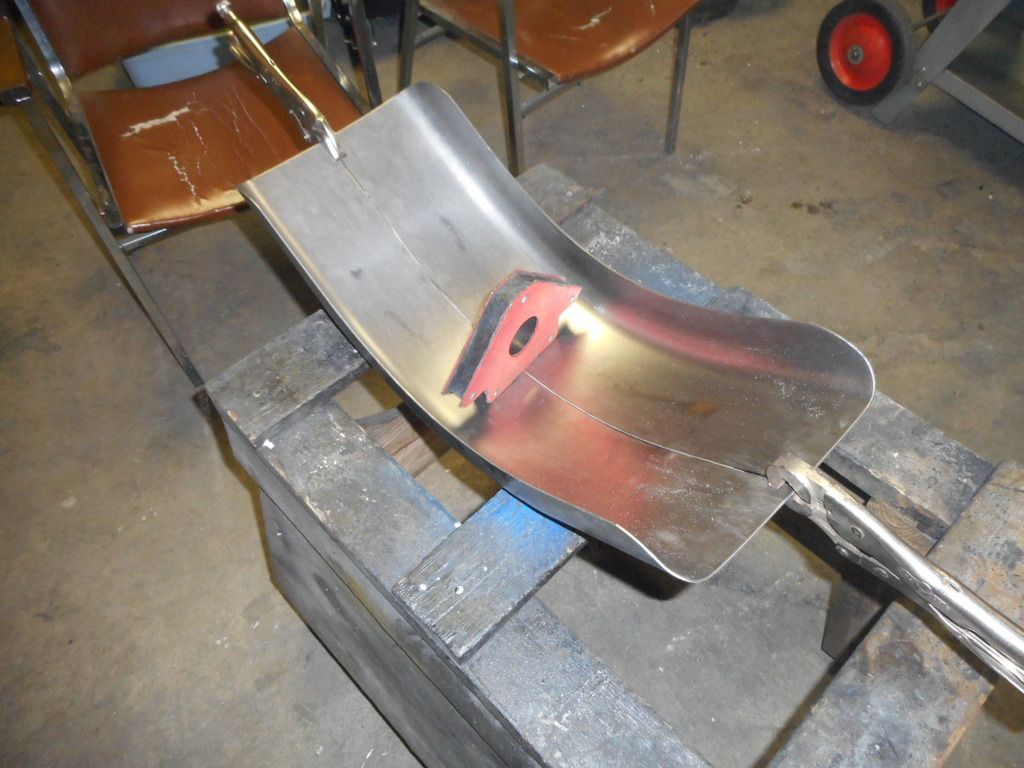
I welded both inside and outside.  I then used my belt sander to smooth the weld on the outside.  My big mistake was I should have lightly hammered the weld so that it would stick up higher than the rest of the sheet metal.  The two halves slightly curved down at the weld which meant the weld was in a (slight) valley.  "No problem" thinks me; "this belts sander really works fast."


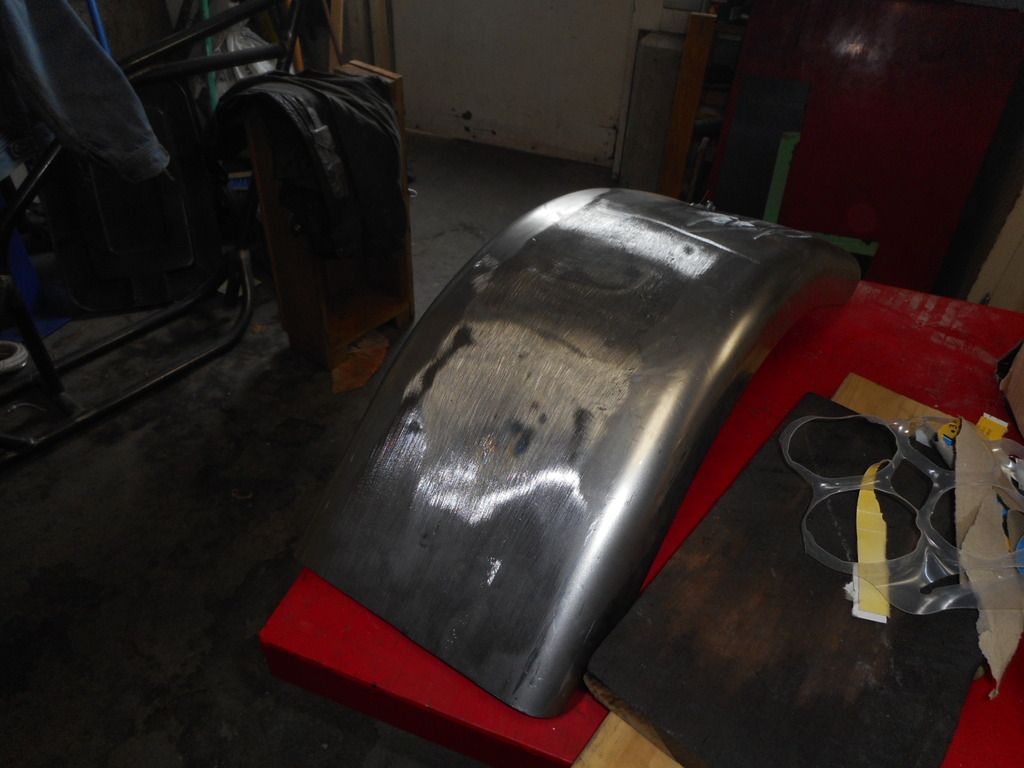
What I didn't know was that was reducing 14 gauge steel down to paper thin in spots.  A crack developed and I thought I could just run  a light bead over top.  Nope.  This was the second one that developed.  The first one I patched.  I'm putting this down to a learning experience.  I won't use this one. 


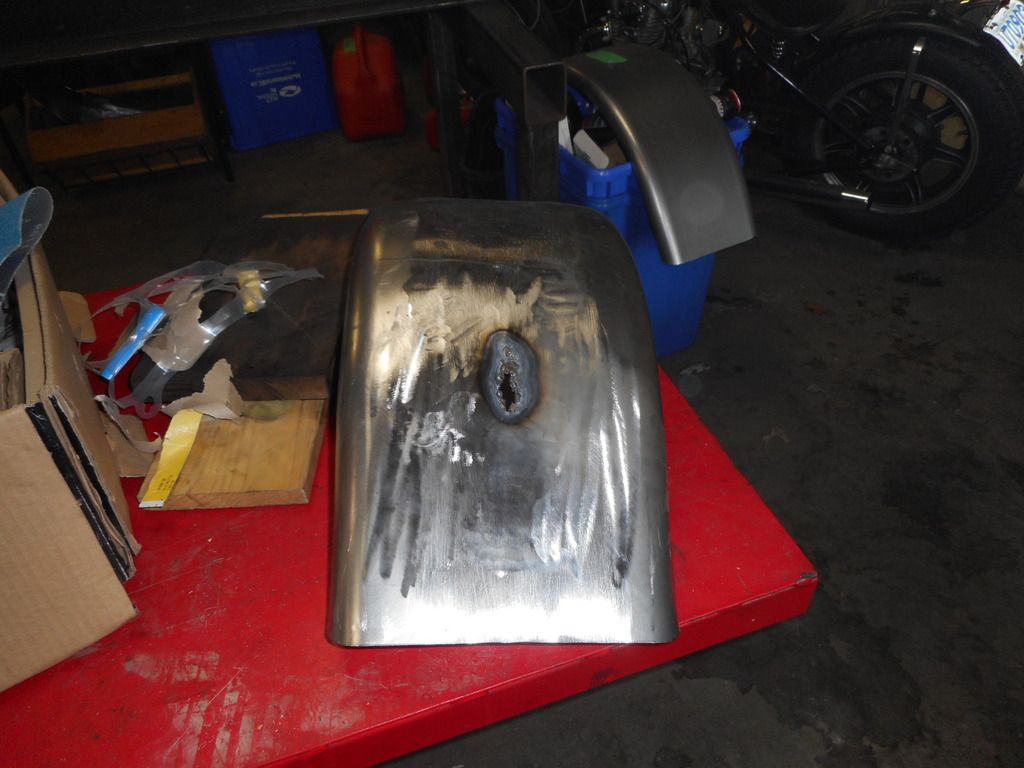
My quandary now is to start over or re-think.  I like the look of no fenders.  The 14 gauge steel is actually pretty heavy.  However I did build this to ride it, and one mud puddle throwing mud all over my engine would spoil my day.  I've thought about using the welded fender as a mold for making them in fiberglass.  I actually took some Crazy Carpet plastic and my heat gun and tried to see if I could bend plastic over the welded fender.  Paul says with a heat gun and a pair of oven mitts you can bend thin plastic to shape.

I'm going to work on the kick stand and think about the fenders..

Peace & Grease, Dennis

« Last Edit: April 01, 2016, 10:28:01 AM by Dennis »

Dennis

  • Club Member
  • *****
  • Posts: 1726
    • View Profile
Re: Mini Bike
« Reply #8 on: April 05, 2016, 07:57:04 PM »
Fabricated a kick stand on the weekend.  I made the whole thing separate and then welded it to the bike.


With the kick stand on, I can now disassemble and do the finish welding. 

Peace & Grease, Dennis

Dennis

  • Club Member
  • *****
  • Posts: 1726
    • View Profile
Re: Mini Bike
« Reply #9 on: May 09, 2016, 10:02:46 PM »
I finished all the welding, including this handle/bumper behind the seat.  I made the seat pan out of plastic.  The handle/bumper was needed because in my test rides around the neighbourhood, I found I could pop a wheelie fairly easily.  Nothing would spoil upholstery faster than a quick drag along asphalt.


Despite everything "Power Fist" at Princess Auto having a distinctive shade of blue, they don't sell "Princess Auto" blue paint.  I've been in email discussion with their p/r people and the best response I got was a confirmation that they don't sell it.  They sell Ford Tractor blue which is much lighter.  My wife found True Blue at Canadian Tire which is pretty close.  Princess Auto has a forum where you can display your Princess Auto projects, and I plan to shame them into selling paint that matches their products.


I'll let the paint cure in my garage until I have time to assemble.  It only took about an hour to take it apart, so I think an evening should suffice to put it back together.  Before the tear down, the bike ran great and I terrorized the neighbourhood with test rides.

Peace & Princess Auto.
« Last Edit: May 10, 2016, 01:57:40 PM by Dennis »

Dennis

  • Club Member
  • *****
  • Posts: 1726
    • View Profile
Re: Mini Bike
« Reply #10 on: May 11, 2016, 10:52:34 AM »
Two steps forward, one step back. 

A few spots of paint were too thin and had that matt look.  I decided to lightly sand the frame and prepare for another coat or two.  I got the sanding done last night and went out to assess the sky.  On several occasions with other projects (such as my Jeep) my rush to get painting has resulted in rain wrecking my work.  I decided to wait and am glad I did.  I now need a sunny evening.

Peace & Paint, Dennis

Dennis

  • Club Member
  • *****
  • Posts: 1726
    • View Profile
Re: Mini Bike
« Reply #11 on: May 18, 2016, 01:13:04 AM »
In my 2nd to last post I showed a picture of the plastic seat base I had made.  Previously I purchased on Ebay a custom seat cover and foam for the size of seat base I made.  Russell (Rusty Bucket) has a pneumatic stapler and a quick visit to his shop had the upholstery finished.


I've done everything I can until I get the brake lever issue resolved (previous post) and a few more SAE bolts.


Peace & Grease, Dennis


Dennis

  • Club Member
  • *****
  • Posts: 1726
    • View Profile
Re: Mini Bike
« Reply #12 on: May 28, 2016, 01:21:48 AM »
FINISHED

Jeff made a new shaft for the brake caliper lever, and drilled the holes larger for it.  The lever moves easily but doesn't twist.


I took it for a few spins around the neighbourhood to make sure everything was adjusted right.  Only a few minor adjustments were needed.


Peace & Grease, Dennis

MaximX

  • Guest
Re: Mini Bike
« Reply #13 on: May 31, 2016, 07:02:07 PM »
Great looking build!  Well done.

Chopperman

  • Guest
Re: Mini Bike
« Reply #14 on: June 15, 2016, 07:56:20 PM »
Far out Dennis. I haven't been on for a while, so just saw this for the first time. Very cool!